Skin Libraries
Skin directory
In MCSkinn, you need at least one folder to be used as your skin directory. This is the root of your skin library, which means MCSkinn can view and edit any skin inside of it, and anything out of this folder cannot be edited.
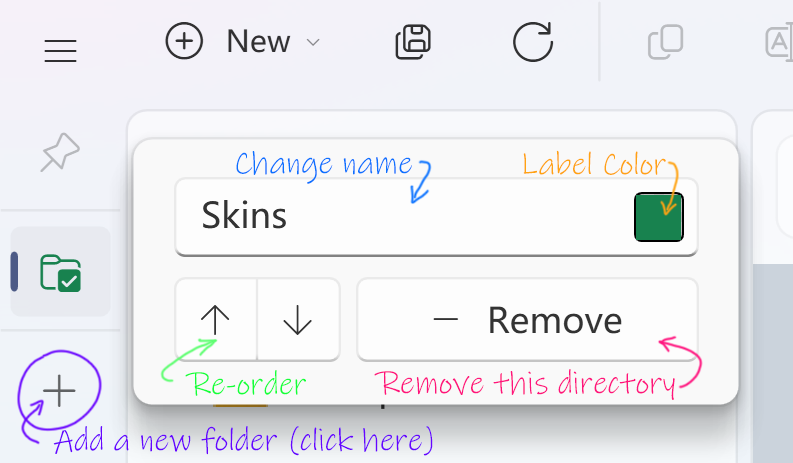
To add a skin directory, please click the + button in the left ‘Skin directory navigation' area, then a browse dialog will appear, select your folder and hit enter, now you can see the folder at the end of the list.
- You can rename or move this directory at any time. But you need to remove the old one and add the new one in MCSkinn later. You can create many directories if you want. But you need to add them to MCSkinn one by one.
- You can put any file in this directory, but MCSkinn will always load PNG files only, which means you'd better NOT put any PNG files that are not Minecraft skin (if you do, MCSkinn will be laggy loading it).
You can right click the icon of a skin directory to modify or remove it. Changing its name (NOT FILENAME) or removing it from the skin directory navigation won't affect the actual the folder itself.

We generally recommend you have only one skin directory so you can manage all your skins in one list easily. However, you can add as many ones as you want. Last but not the least, you need at least one skin directory to get started.
DO NOT put any of your skin directories in the program install folder. Once the app is updated, everything will be cleared!
Skin list
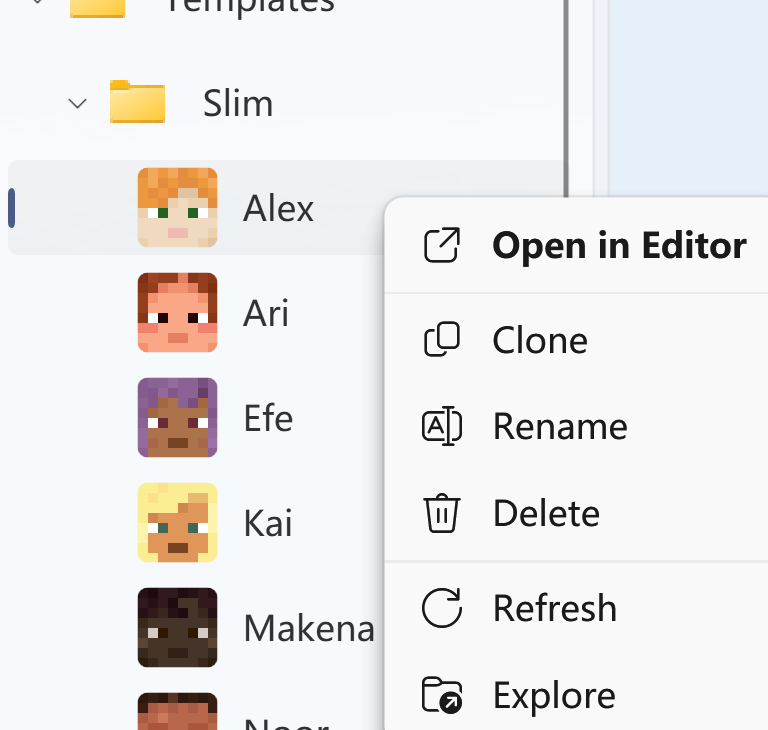
All your skins and folders in the selected skin directory will be displayed in the skin list with a tree-like structure. You can click a skin to start editing. When a folder is selected, the program will show its welcome screen. No worries, just select a skin instead.
You can right click a node (any skin or folder) to open its context menu to rename, duplicate or delete it. You can also click Reload (or Refresh in some versions) to reload the skin or folder completely or click Explore to locate this node in Windows File Explorer.

Drag'n'drop internally is also supported. Before dragging, you need to make sure the node you want to drag is selected (to prevent touch issues, only selected nodes can start a drag) and it is already saved. Tip: After drag drop operation, the dragged skin will lose its changes (there should be a message warning you about this when your skin is not saved).
Toolbar Commands
In the top of the window are menu bars and the main toolbar. They have almost the same functions, but we suggest you using the toolbar, it has more functions and is easier to use. Here are the commands in the toolbar (from left to right)

-
New skin/folder: Add a new skin or folder under your current selection.
-
Save All: Save all your changes on all skins at one time.
-
Reload: Reload your selection, current directory or everything. (this is extremely useful when you have edited the skin in an external editor, you want to discard all the changes of this skin, or MCSkinn didn't load this node correctly)
-
Duplicate: Make a copy of your selection instantly.
-
Rename: Open a rename form to rename your selection.
-
Delete: Delete your selection (there's always a message box).
-
Explore: Locate your selection on Windows Explorer.
-
Open With: Edit your skin with your favorite external image editor.
-
Resolution: View or change the resolution of your skin.
-
View Options: Change some options for viewport.
-
Quick Actions: Some useful action and tools (coming soon)