Preparations
Before We Begin
This series of documents will guide you through building your own Minecraft skin from scratch. First, you need to ensure that your MCSkinn is correctly configured and the skin library folder is set up. If not, please refer to here. If you're ready, scroll down. After these tasks, you'll (definitely) be delighted to see your creativity come to life in MCSkinn!
You don't always have to follow the steps in the document verbatim. Adding your own creativity and understanding will be more beneficial in creating a unique skin!
Create a new skin
In the File menu bar, you'll see a Skin button. Click on it, and a popup window will appear.
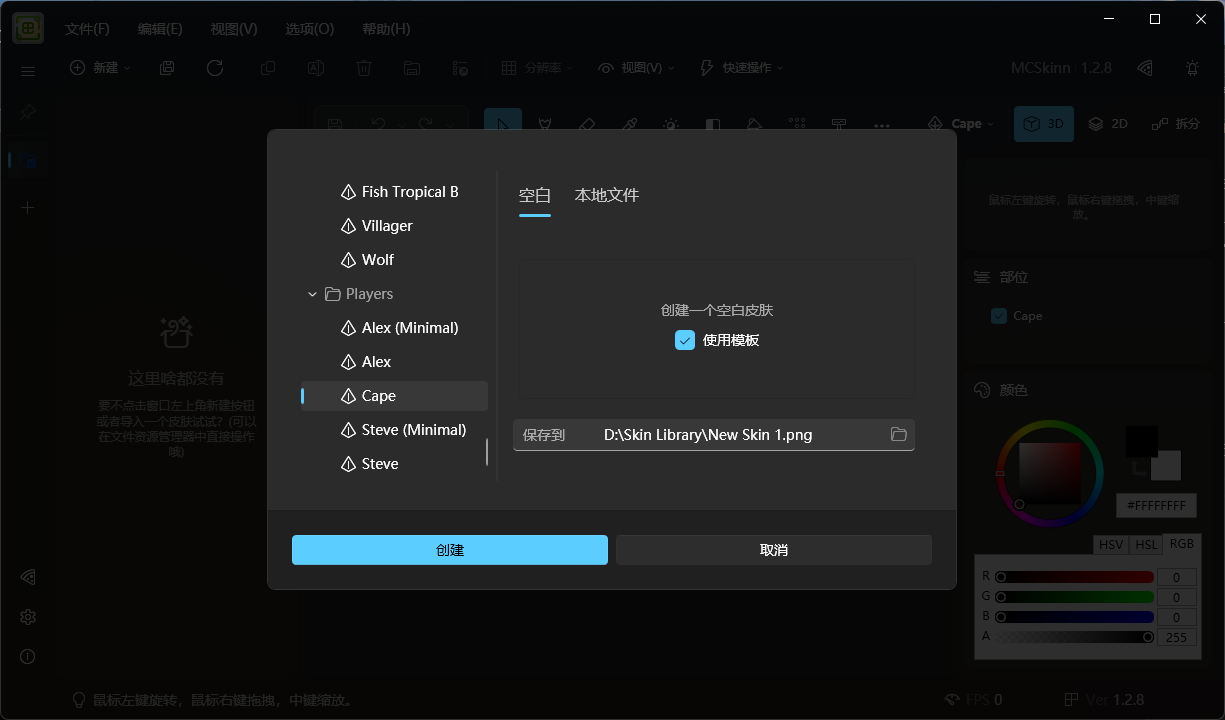
A configured skin selector.
The left pane of the selector displays various skin models in Minecraft. Typically, you just need to navigate to the Player folder and choose from there.
There are 5 types of skins under the Player folder. The Cape type is for capes of Minecraft, while Steve and Alex types control the thickness of your skin's arms. The (Minimal) suffix controls the layers of your skin (single or double layers).
Unless your skin needs to be compatible with Minecraft versions older than 1.8, we DON'T recommend using single-layer skins.
On the right side of the selector are some related options. The Blank and Local File tabs control whether you're creating a new skin directly or opening an existing skin file. Under the Blank tab, there's a checkbox for Enable Template, disabling which will fill each part of your skin with a different color of translucent color, like this:
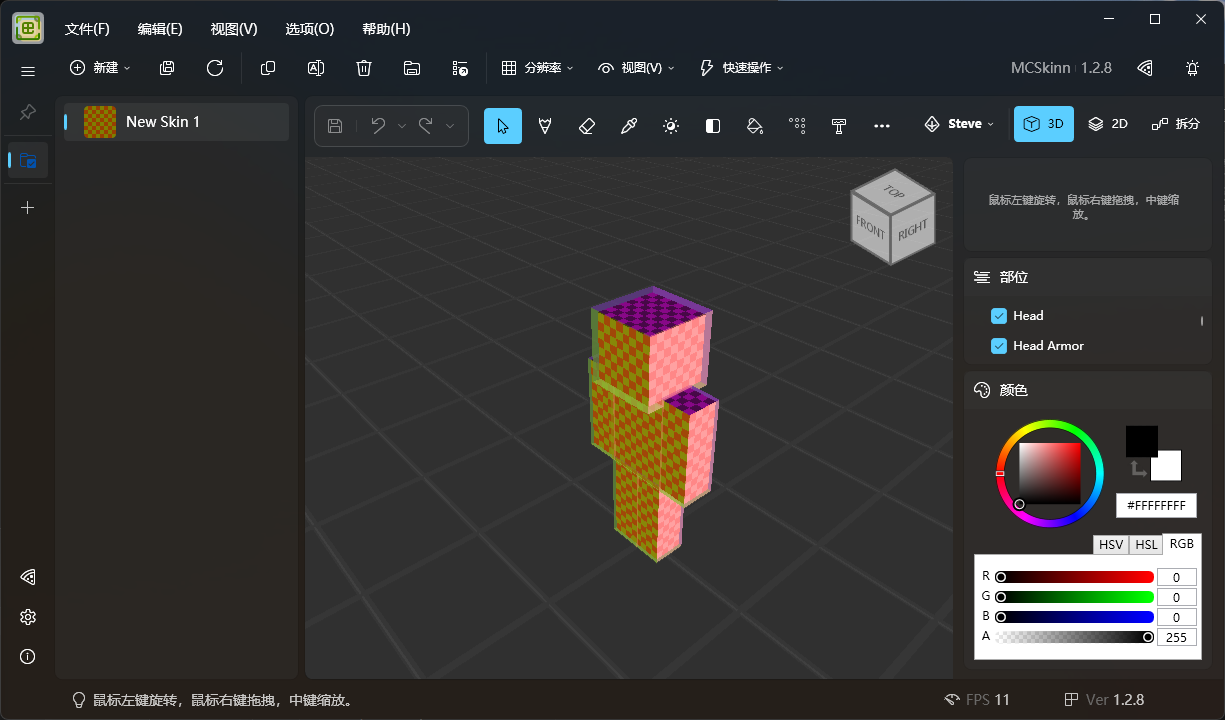 Steve skin style when the template is disabled.
Enabling this option will display your skin as the default skin type.
At the bottom is the path where your skin will be created, it's recommended not to change it.
After selecting all the options, click Create, and you'll see a skin ready for editing.